The Straight Answer: Yes, you can remove residential window tint yourself, but it’s tedious, messy, and time-consuming work. Most homeowners spend 30 to 60 minutes per window scraping off film and cleaning adhesive residue. The process requires heat (from a steamer or heat gun), razor blades, cleaning solutions, and patience. While DIY removal is possible, the risk of scratching glass or leaving stubborn adhesive behind makes professional removal worth considering, especially for multiple windows or old, deteriorated film.
Before You Start
- DIY removal takes 30 to 60 minutes per standard window
- Old film (10+ years) is harder to remove than newer film
- You’ll need a heat source, razor blades, and adhesive remover
- Scratching the glass is the biggest risk with DIY removal
- Adhesive residue requires separate cleaning after film removal
- Professional removal typically costs less than the time and frustration of DIY
Someone asked me last week if they could remove their own window tint. They’d watched a YouTube video that made it look easy.
I told them the truth: yes, you can do it yourself. But that video probably skipped the part where you spend three hours scraping adhesive residue off one window, or the moment you realize you’ve scratched the glass with your razor blade. DIY removal is possible, it’s just rarely as simple as it looks online.
Let me walk you through what’s actually involved so you can make an informed decision.
Why Removing Window Tint Is Harder Than Installing It
Here’s the thing about window film: it’s designed to stay put. The adhesive bonds to glass and, over time, that bond gets stronger as the adhesive cures. Meanwhile, UV exposure degrades the film itself, making it brittle and prone to tearing into small pieces during removal.
Fresh film (installed within the last year or two) usually comes off in large sheets. Film that’s been on your windows for 10 to 15 years? That’s a different story. It breaks apart as you pull, leaving you to scrape off hundreds of tiny fragments. If you’re dealing with film that’s reaching the end of its lifespan, check out our article on how long window film typically lasts to understand what you’re working with.
The adhesive is the real challenge. Even after the film comes off, you’re left with a sticky residue that requires aggressive cleaning. This is where most DIYers give up and call a professional.
What You’ll Need for DIY Removal
If you’re committed to doing this yourself, here’s your shopping list:
Heat Source
- Steamer (best option, less risk of glass damage)
- Heat gun (works well but can crack glass if held too close)
- Hair dryer (weakest option, takes forever but safest)
Scraping Tools
- New razor blades or a razor scraper tool
- Plastic scrapers as a safer alternative
- Never use metal scrapers on tempered or coated glass
Cleaning Supplies
- Ammonia-based glass cleaner or dish soap solution
- Adhesive remover (Goo Gone or similar)
- Paper towels and microfiber cloths
- Spray bottle for cleaning solution
Protection
- Drop cloths or towels (this gets messy)
- Gloves (ammonia irritates skin)
- Safety glasses (prevents cleaning solution in eyes)
You probably have some of this at home already, but don’t skip the heat source. Trying to remove film without heat multiplies the difficulty by about ten.
The DIY Removal Process Step by Step
Here’s how removal actually works when you do it yourself:
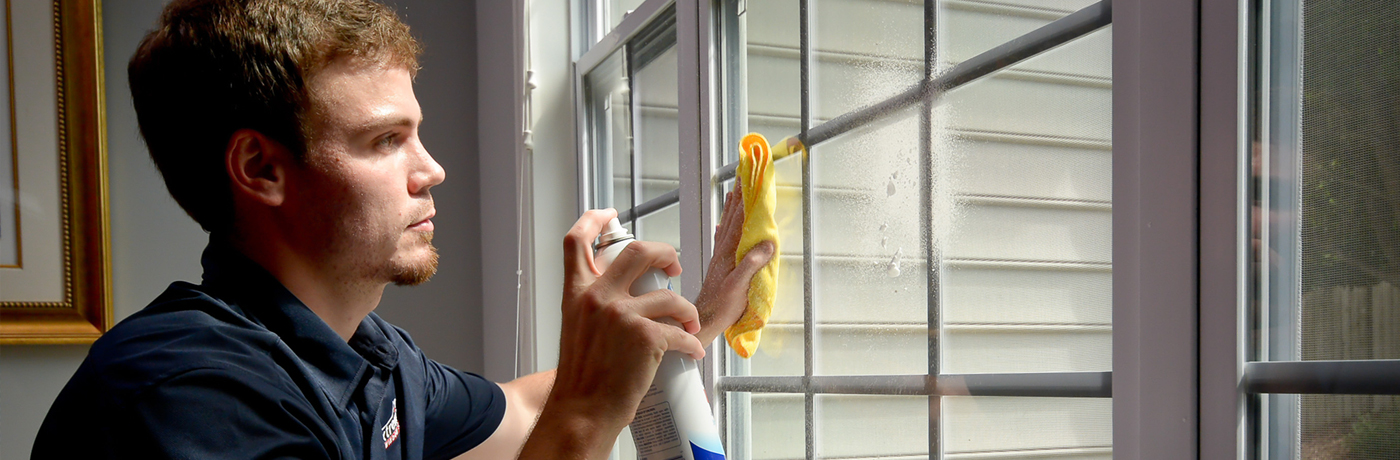
Step 1: Heat the Film Start at a corner and apply heat directly to the film. Hold your heat source 4 to 6 inches from the glass and move it continuously. The goal is to warm the adhesive without overheating the glass. You’ll know it’s ready when the film feels warm to the touch.
Step 2: Peel the Film Lift a corner with your razor blade and start peeling slowly. Pull at a 45-degree angle, keeping tension constant. If the film tears, reheat and start again from that spot. This is where patience matters. Rushing leads to tiny pieces that take forever to scrape off individually.
Step 3: Remove Adhesive Residue Once the film is off, you’ll see sticky residue all over the glass. Spray it with ammonia solution and let it sit for 5 to 10 minutes. The ammonia breaks down the adhesive. Then scrape it off with your razor blade held at a low angle (almost flat against the glass). Wipe clean and repeat until all residue is gone.
Step 4: Final Cleaning Even after scraping, you’ll have a haze on the glass. Clean with glass cleaner and paper towels until the window is clear. This step usually requires multiple passes.
Multiply this process by every window in your home and you’ll understand why many people start strong but end up hiring help for the remaining windows.
Common DIY Mistakes That Create Problems
Using Too Much Heat Overheating glass causes stress cracks, especially on dual-pane windows where temperature differential between panes can cause seal failure. Keep heat moving and don’t focus on one spot too long.
Scraping at the Wrong Angle Razor blades should be nearly flat against the glass (10 to 15 degrees). Steep angles increase scratch risk. Light pressure is key. You’re coaxing adhesive off, not scraping paint.
Trying to Remove Dry Film Film needs to stay warm and somewhat pliable during removal. Working on cold, dry film guarantees it’ll break into confetti-sized pieces. Keep reheating as you work.
Rushing the Adhesive Removal This is where most DIYers lose patience. Adhesive doesn’t come off in one pass. It requires heat, solution, waiting time, and repeated scraping. Trying to speed through leaves permanent haze on the glass.
Using the Wrong Blade Dull blades don’t cut cleanly and require more pressure, increasing scratch risk. Change blades frequently. A box of 100 razor blades costs a few dollars, use them liberally.
How Long Does DIY Removal Actually Take?
Let’s be realistic about time investment. Here’s what I’ve observed from homeowners who attempted their own removal:
|
Window Size |
Film Condition | Typical Time | Difficulty Level |
| Standard (3×4 ft) | New (under 5 years) | 30 to 45 minutes | Moderate |
| Standard (3×4 ft) | Old (10+ years) | 60 to 90 minutes | Difficult |
| Large (6×6 ft) | New (under 5 years) | 60 to 90 minutes | Moderate |
| Large (6×6 ft) | Old (10+ years) | 2 to 3 hours | Very difficult |
| Sliding door | Any age | 90 minutes to 2 hours |
Difficult |
These times assume you know what you’re doing and don’t make major mistakes. First-time removal usually takes longer as you figure out technique.
For a typical home with 10 to 15 windows, you’re looking at a full weekend of work, possibly more. And that’s if everything goes smoothly.
When DIY Makes Sense vs. When It Doesn’t
DIY Removal Makes Sense When:
- You have only 1 to 3 windows to do
- The film is relatively new (under 5 years old)
- You’re physically capable of repetitive scraping motions
- You have a full day to dedicate to the project
- The windows are easily accessible (no ladders needed)
- You don’t mind the trial and error of learning
Professional Removal Makes More Sense When:
- You have 10+ windows to remove
- The film is old and deteriorated
- You’re dealing with large picture windows or sliding doors
- Windows are high up or difficult to access
- You value your time more than the removal cost
- You want guaranteed results without glass damage risk
I’ve seen plenty of homeowners start removing film themselves, do two windows, then call us for the rest. There’s no shame in that. It’s a legitimate assessment of effort versus outcome.
The Real Cost of DIY Removal
Even though you’re doing the work yourself, DIY removal isn’t free. Let’s look at actual costs:
Tool and Supply Expenses:
- Steamer rental: approximately $30 to $50 per day
- Razor blades: $5 to $10 for a 100-pack
- Adhesive remover: $8 to $12 per bottle
- Cleaning supplies: $10 to $15
- Drop cloths and protection: $10 to $20
Total material cost: roughly $60 to $100 for a complete removal job
Time Investment: If you value your time at even $20 per hour (less than what most professionals make), and you spend 10 hours removing film from 10 windows, that’s $200 worth of your time. Add the material costs and you’re at $260 to $300 for a DIY job.
Professional removal for the same 10 windows might not cost much more than your DIY effort when you factor in time and frustration. But I’m not here to talk you out of DIY if you want to try it. Just go in with realistic expectations.
What If You Damage the Glass?
This is the risk nobody talks about until it happens. Scratched glass can’t be fixed, it has to be replaced. A single replaced window pane can run several hundred dollars depending on size and type.
Tempered glass (common in doors and large windows) is particularly vulnerable. If you score the surface with a razor blade, you’ve compromised its structural integrity. Low-E coated windows can have their coating damaged during aggressive scraping.
The biggest scratch risk comes from:
- Debris trapped under the razor blade (tiny metal or glass particles)
- Using excessive pressure when scraping
- Scraping at too steep an angle
- Working with dull blades that require more force
- Rushing through adhesive removal
One scratch can erase any cost savings from DIY removal. That’s the gamble you take.
Alternative Removal Methods
Beyond the standard heat and scrape approach, some people try other methods:
- Ammonia and Sun Method Cover the film with ammonia-soaked newspaper and a garbage bag, let it sit in direct sunlight for hours. The heat and ammonia supposedly loosen adhesive. Reality: this takes all day, makes a mess, and still requires scraping.
- Fabric Softener Solution Mix fabric softener with water, spray on film, let it soak. Some people swear by this. In my experience, it works marginally better than plain water but still requires heat and scraping for old film.
- Commercial Film Removal Products Specialty chemicals designed for film removal. They work better than household products but add significant cost. Often still require heat and scraping.
- Steam Wallpaper Remover Using a steamer designed for wallpaper removal. Actually works quite well and is less likely to overheat glass than a heat gun. Good option if you can borrow or rent one.
None of these methods eliminate the fundamental challenge: you still have to scrape adhesive residue off glass. They just make different parts of the process slightly easier.
What About Privacy or Decorative Film?
Static cling film (the kind with no adhesive) is completely different. It peels off in seconds and leaves nothing behind. If that’s what you have, removal is trivial. Just grab a corner and pull.
Adhesive-backed decorative film or frosted film follows the same removal process as tinted film. Same challenges, same time investment, same risks.
Can You Reuse Removed Film?
No. Once film is removed, it’s garbage. The adhesive is contaminated with debris and has lost its bonding properties. Even if you somehow managed to get it off in one perfect piece (you won’t), it wouldn’t stick to a new window properly.
If you’re removing film because you want to change styles or darkness levels, you’re starting from scratch with new film. The old stuff has no salvage value.
Professional Removal: What’s Actually Involved
I mentioned professional removal several times, so let me explain what that actually looks like. When you work with professionals for residential window tinting in Greenville, removal of old film is often part of the process if you’re replacing it with new film.
Professional removal uses commercial steamers that generate consistent, controlled heat. Technicians have refined their scraping technique over hundreds of windows, minimizing scratch risk. They use professional-grade adhesive removers that work faster than consumer products. Most importantly, they’re fast because they do this daily.
A professional can remove film from a standard window in 10 to 15 minutes, including adhesive cleanup. That same window might take you an hour. The efficiency difference is substantial.
Making Your Decision
Can you remove residential window tint yourself? Absolutely. Should you? That depends on your situation.
If you have a couple of windows, reasonable DIY skills, patience, and a free weekend, go for it. Get the right tools, watch some tutorials, take your time, and you’ll probably succeed. It won’t be fun, but it’s doable.
If you’re looking at your entire house, the film is ancient and falling apart, you’re unsure about the process, or you just don’t want to spend your weekend scraping glass, professional removal makes sense. The cost difference isn’t as dramatic as you might think, especially when you factor in your time and the risk of damage.
The Bottom Line
DIY window tint removal is possible but labor-intensive. You’ll need 30 to 60 minutes per window, the right tools, and patience to deal with stubborn adhesive residue. The process involves heating the film, peeling it off slowly, scraping away adhesive, and thorough cleaning.
The main risks are scratching glass with improper scraping technique and underestimating the time investment. Old, deteriorated film is significantly harder to remove than newer film.
Whether DIY makes sense depends on how many windows you need to do, the condition of the existing film, and whether you value your time more than the cost of professional removal. There’s no wrong answer, just different trade-offs.
Considering new window film after removal? Learn about warranty considerations before making your decision.
